As the weather stays cold throughout the rest of the winter season, you’ll undoubtedly find yourself spending more time indoors. While this can present great opportunities to spend quality family time or entertain friends, winter can also be a great time to tackle an indoor home renovation project.
For most people, our home’s floors can be easily neglected over a number of years. We tend to take the quality of our floors for granted, so we might not even recognize when it’s time to make an upgrade. If you already have hardwood floors in your home, but they’ve been installed for many years, you might take a second to notice your floor’s condition.
If your hardwood floors no longer look like you remember them when they were first installed, it might be time to refinish the wood in order to bring back that appealing shine. While it’s generally recommended that you seek professional assistance when doing extensive work on your hardwood floors, you should be able to refinish your floors on your own relatively simply.
In order to help you refinish your floors in the New Year, we’ve provided a step-by-step list of everything necessary to help your refinish your own hardwood floors in just one day:
Step 1: The Tools for the Job
Start by finding a special refinishing kit that comes with all the essential items you’ll need to successfully restore your floors. Floors that are worn or slightly scratched can often be refinished without going through the hassle of sanding off the existing finish. By applying a liquid etcher that roughens your existing finish, allowing for the new finish to successfully bond, you’ll be able to give your floors a shiny new coat that will last for years and help to extend the life of your floors.
Step 2: Clean and Clear
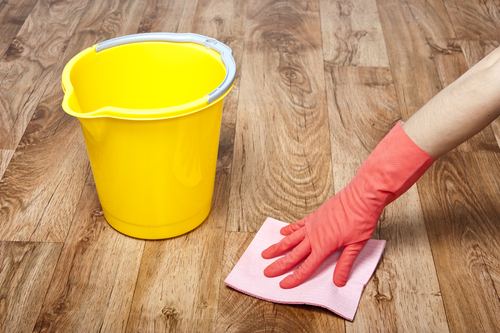
Before you can begin refinishing, it’s best to clear any furniture or clutter that will get in your way. It is essential that you take time to clear the room of any existing dust. Make sure to vacuum your floors and then wipe it down with a damp cloth. If you have any remaining “gunk” spots on your floor, use a gentle abrasive pad to safely clear the floor of all lingering debris.
Step 3: Liquid “Sanding”
Once your floors are dust and furniture free, you’ll utilize your liquid etcher to effectively “sand” the existing finish on your floors. It helps to start with small sections, applying liquid etcher and scrubbing with your abrasive pad. Be sure to avoid scrubbing against the wood’s natural grain and make sure to apply firm pressure.
Step 4: The ‘Touch Up’
Once your liquid etcher has been applied and given time to dry, it’s time to prepare a mixture of warm, soapy water that you’ll use to damp-mop the entire floor. Mopping with soap and water will effectively neutralize the liquid etcher. Water can be damaging to your hardwood floors, so it’s important to work in small sections and wipe up any larger spills or puddles immediately.
Step 5: Application
Once your floor has dried and you’ve tended to any bothersome scratches, it’s time to apply your new finish. However, you must be quick and strategic about this final stage. Once your finish is spread on the floor, you probably have just five to ten minutes before it will become impossible to smooth out. Lining up a helper and making a plan will help you avoid painting yourself into a corner!