If you’ve been considering installing new hardwood floors in your home, it’s important that you take a look at all the options available to you. What is right for your home, and what you like, will undoubtedly be different for everyone, so it is of extra importance that you do your due diligence and research the types and styles of hardwood floors out there.
At Smith Brothers, we’ve been helping families upgrade their beautiful hardwood floors for more than 100 years, and we know the importance of listening and designing solutions that fit our client’s specific needs and preferences. We are here to assist you with any and all of your hardwood flooring needs.
If you’re thinking about getting new floors, you should consider these steps for laying your own prefinished floors in just one weekend:
Prep the Room
Prefinished hardwood floors can be installed directly over existing hardwood, but ideally you’ll install it on top of sound plywood or OSB underlayment grade subfloor. You’ll need to prep the room by removing the baseboard, being careful to undercut the bottoms of the doorjambs and casing to ensure that the new flooring can slide underneath. Cover your subfloor with rosin paper to create a slip area between floor surfaces that will help to minimize potential squeaks.
Lay Flooring
Once your baseboards and trim are removed, you’ll be able to start nailing down the flooring in whichever direction you desire. It can help to begin with a long piece of flooring, as it will help to ensure that you establish a straight start. If there is a doorway along your starting wall, make sure to slip a small piece of flooring behind your first strip and into the doorway, as this will be much more difficult on the back end.
Utilize a chalk line and longer strips of flooring when starting out in order to keep your lines straight. You can face-nail each piece with pairs of nails about every 16 inches running the length of the piece. Continue across the room, installing pieces of your desired length, and be sure to account for one-half inch of expansion space on either end.
Special Spots
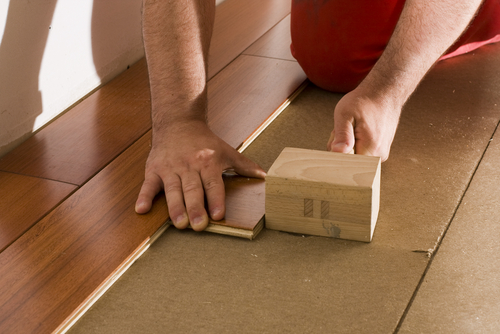
Once you’ve laid most of the flooring, you might have to go back and tend to the few small spots that require custom-length pieces. You’ll have to measure and cut out pieces to fill any remaining gaps in your new floor. When face-nailing your final pieces, you should take time to tighten the flooring seams near the end wall with a pull bar. You can then face-nail your flooring pieces about one half-inch from back from the tongue.
Finishing Touches
Once your floors are installed successfully, you can nail all baseboards and trim back into place and cut your base shoe to size. For a clean finish, make sure to fill all nail holes with matching putty. You may also want to explore different stains to bring out the type of color and texture you’re looking for. Once you’re done, be sure to minimize sliding heavy furniture on your new floors, in order to avoid scratches. If you’d like to read more about installing your own pre-finished hardwood floors, check out the link here!